As your scooter’s brakes are worn during use, the levers will become less effective at engaging the shoes as time goes on. By maintaining a proper amount of freeplay in the lever pull, you can most the most effective use of your brakes throughout their life.
Pulling your brake lever actuates a cable that squeezes the brake shoes against the surface of the brake drum. As your brakes wear out, the lever needs to pull the brake actuator further in order to apply the same amount of stopping force that a newer brake assembly requires. Compensating for this wear is simple, and you do not even need a wrench to make the adjustment.
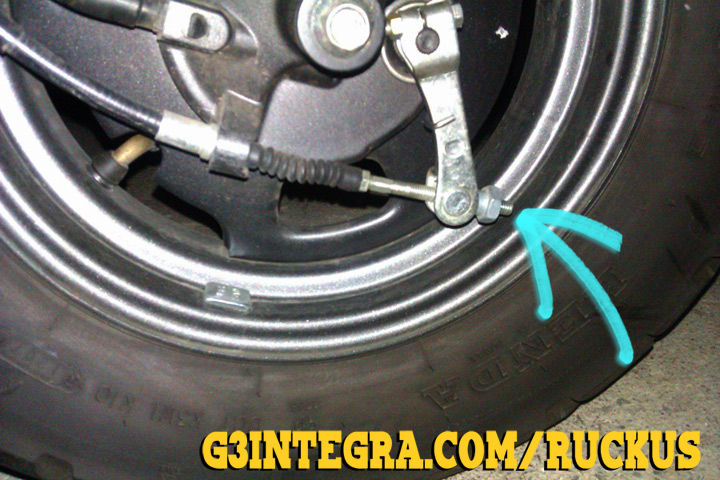
Examine your front brake as you squeeze the right brake lever. At the back of the brake arm, you will see a protuding bolt and attached nut. Tightening this nut (with your fingers!) will reduce the amount of freeplay in the brake lever. Only make adjustments to your brake play while the front wheel is pointed straight forward. Find more details and specific measurements below the photo.
Adjustment instructions
- Pull the brake lever slowly until it begins to engage the brake
- Measure the freeplay, or space before engagement, of the lever and turn the adjustment nut to maintain 3/8 – 13/16 inches (or 10-20mm)
- Turn the adjustment nut a half turn at a time, and make sure the cut out on the nut is properly seated on the brake arm pin
Have you considered upgrading your Ruckus front drum brake to a disc? Take a look at our disc brake parts list.


Leave a Reply